Tuesday, August 25, 2015

Entry Four: The wax debate

So, now we that we know the differences between waxes and sealants, lets get to which looks better. I'll just let this unaltered photo let you decide. While, the photo doesn't quite show how great they look in real life, it is an accurate representation of the differences.


The panels were wet sanded and polished

Both panels were wet sanded with 2000 grit and then meticulously polished with the 3M Perfect-it system. The panel on the left was then topped with Meguiar's NXT and left to cure overnight. The right panel was polished again with Meguiar's Show car glaze #7 and topped with Meguiar's Deep Crystal Carnauba wax. 


NXT Panel 

Carnauba Panel

Again, they both look great, but to me the NXT panel is slightly wetter looking with starker contrasts ranging from very deep to very bright. The carnauba darkens the paint a shade or two, but it looks a little plastic and doesn't have the contrast of NXT. Honestly, they both look great, and there isn't really a correct answer here. 


Saturday, August 22, 2015

Entry Three: Wax


A collection of commonly available waxes

There are a lot of waxes out there, and choosing the right one can be a difficult. Hopefully this overview will help you understand the differences so you can pick the best one for you. I will also be sharing some tricks and tips along the way.

Traditional waxes are usually a combination of carnauba, beeswax, petroleum distillates, and other natural oils. Waxes containing large quantities of carnauba wax are known for their deep warm gloss. However, these waxes aren't very durable and typically last only six to eight weeks. 

Sealants are composed entirely of man-made ingredients. They offer superior long lasting protection and incredible shine, but often lack the rich deep luster of natural wax. Any sort of 'synthetic wax' is a sealant.

Glazes are polishes that offer no protection against the elements. Their sole purpose is to maximize shine before using a pure wax.

Applying a finishing sealant with an applicator pad

Finishing Wax
These waxes enhance the beauty of a highly polished finish. Some are pure wax, while others often contain fillers, mild cleaners, and polishers. Glaze should be used when using a pure wax maximize shine. However, there is no need to use glaze when using products with cleaners or polishers built in. 


Cleaner wax
These are the most commonly available waxes and often referred to as an 'all in one'. These use abrasives, detergents, and chemical solvents to clean, polish, and protect, all in one step. Application: You simply work them into your paint with the supplied applicator to remove dirt/road grime, fine scratches, and old wax/sealants. If you car is a daily driver, these are a great option after a wash. 

Tip: Cleaner waxes are used to restore a shine to a worn finish. Use them after using a compound or claybar for a nice finish. They should never be used on a new or highly polished finish or the abrasives will dull down the finish.


Keep a squirt bottle handy to soften harder waxes

Technique
Applying: Most waxes should be not be applied in direct sunlight or to a hot surface. When applying wax with an applicator, move the pad in small overlapping circles. This will remove any contamination that may prevent the wax from adhering to the surface. The motion also helps distribute the wax evenly to prevent any streaking. 

Removal: Let the wax sit for twenty minutes or so until it has completely glazed over. For best results, allow sealants and synthetic waxes to cure overnight when possible. Always use a microfiber towel to remove the wax. Carnauba wax is naturally very hard. Those waxes with high concentrations can be tough to remove, so keep a squirt bottle handy when working with them.

Coats: It is not uncommon to add another coat of wax. The wax that you choose will play a significant roll in how many coats can be applied. Most waxes, like those with abrasives can only have one coat since they will just strip the previous layer off. However, some waxes can have dozens of coats applied. In many cases there are diminishing returns and even some of the best waxes can become cloudy after only a few coats. 


This panel was glazed and carnauba waxed

Advanced Techniques
Glazing: This is the final step in the polishing process and is done to achieve the highest possible shine. Be sure to wax after glazing to protect your finish. Using anything other than a pure wax can undermine all your effort. 

Layering: Since sealants often lack richness of carnauba wax, some detailers will put a layer of wax over them. This will give you the long lasting protection of a sealant and the deep rich gloss of carnauba wax.


Tip: The Carnauba wax that you choose to go over the sealant must be a pure wax that contains no cleaners/polishers.  A cleaner wax will strip the base layer and dull the paint back to the cleaning stage where you will need to polish all over again. Even a lot of finishing waxes contain ingredients that can weaken or strip the sealant. You will learn very quickly that the products that you use make all the difference. The professionals often use specially formulated, high-end products that are meant to work together as a system. While you don't need expensive products, a lot of time and money can be spent trying find the right combination.


Note: Make sure that the sealant cures for 24-48 hours before applying any wax. Carnauba is naturally acidic and can eat uncured sealant off.


Glaze, carnauba wax, and finishing sealant

Results
I used some commonly available waxes to do some test comparisons. I've tried a few high-end waxes and still prefer NXT tech wax because its great shine and easy application. NXT is also a finishing sealant, so it lasts longer than traditional waxes and I genuinely can't tell the any difference in shine between it and show car glaze; but I digress.

The panel I tested on was machine polished with the entire Perfect-it system. This panel has no orange peel so the glaze made it look like a mirror, but it was still a little flat. The deep crystal carnauba really brought the color, but at the expense of some of the mirror-like sharpness. After letting it sit 24 hours, the wax did become crystal clear, but it it also lost some of it's luster from sitting in the sun. A panel I left in my shop still looked amazing 24 hours later.

A sealant was applied to the other half of the panel and given a 48 hour cure time. The sealant contained polishers and looked as glassy as the glazed area, but a little richer. After applying the carnauba over top, I actually was hard pressed to find to decide which I liked better. The sealant looked like a glass mirror, while the carnauba looked a little deeper but very plastic.

That said, I really like the look of deep crystal carnauba wax. It does look a little like plastic, but in a good way. I couldn't tell any difference between putting it over the glaze or the sealant. Both polished to a high gloss and I didn't see any difference in shades.  As for a comparison, the NXT doesn't quite match the richness of the carnauba wax, but it looked more like glass than plastic. It also takes half the effort to apply, lasts longer, and still looks wet weeks later. Factor in that it costs only $14 and you can see why I recommend it so often.

I also tested Griot's 'Best of Show' wax. I had heard good things, so I applied it by hand to a glazed panel and to another using an orbital, per the instructions. I got the same results in both cases. I felt the shine was rather dull and flat by comparison to the other waxes. Griot's has a cleaner wax in their lineup, so this should be their finishing wax. It was a definitely a great shine that many would be satisfied with, but not quite on par with what I'm used to. I'll give it an 8.

Anyway, I hopes this helps!


Saturday, August 15, 2015

Entry Two:  Removing Oxidization


These softer Alkyd paints that were used on older Volkswagen and Porsche vehicles oxidize very quickly if left unprotected. Oxidization occurs when these paints sit unprotected from the Sun's UV rays. Keeping your car in a garage or even washing and waxing it regularly is a good way to prevent it from happening.  Luckily, if your car is a solid color, they're single-stage so there isn't a thin clear-coat to peel off, so restoring them is fairly simple. Once restored, regular waxing will keeping them looking beautiful for years to come.

Unlike etchings and blemishes, you don't want to use any kind of sandpaper to remove oxidization. In this case, we are just wanting to remove as little of the paint as possible. So work backwards and don't start with your heaviest compound, instead try a cleaner wax.  These are designed as a one step process to remove old wax, sealants, road grime, and light swirls. They often contain abrasives, detergents, or sometimes even chemical solvents to clean the paint and leave it looking nice. In most cases they are strong enough to remove light oxidization.

However, oxidization can get pretty bad, and lets be honest, you wouldn't be reading this blog if any of the consumer stuff worked. 

My weapon of choice when things get difficult is 3M Perfect-it. 

  
3M Perfect-it System with clean terry cloths


Now, before you run out and buy the entire system, understand that compounds like this are required if you are wet sanding paint. However, with oxidization most people might just be happy with the shine left by Step 1. So it must be said that if you intend to buy the whole set, then this is a rather expensive way to remove oxidization and should be your last resort. A professional detail would be cheaper and perhaps more effective. That said, I realize that some of you would still prefer the DIY method, so lets get started!

As I mentioned in my previous post, perfect-it Rubbing compound can remove 1200 grit sandpaper. This means it can easily blast through the heaviest oxidization. While I have heavier cutting compounds, this one is hands down the best and most versatile. 

It doesn't really matter what compound you buy, but professional grade compounds are not available at Walmart. You will have to find an automotive paint shop or order it online. If you choose to go with another brand, make sure that whatever you're buying can remove 2000 grit sand scratches. A compound that can't remove 2000 grit might not be strong enough to remove heavy oxidization. Also, make sure the label says the compound can be worked by hand. These paints can burn easily when using a machine. 


Heavily oxidized VW Campmobile

When oxidization is this bad, you either need a pro or a serious rubbing compound. The owner had tried a few consumer products to no avail. 


Before and after

Step 1 wipes right though these rust stains

Step One: If you read my previous post, then you are doing the same exact steps, sans the wet-sanding. As you can see, I applied a dime sized amount of Step 1 to a terry cloth and worked it into the paint. Immediately the shine was restored.


If you are satisfied with this shine, then you can finish with a cleaner wax. However, if you have bought the other two steps, then proceed to step two.

Machine: Again, I don't recommend using a machine on this step. 

Shine restored!

Step Two: Rinse the panel and after it dries, gently work Step 2 into the paint with a clean terry cloth.  

Machine: If you are experienced with a machine, you can try using Step 2 with a polishing pad. This probably isn't the paint a novice should be learning on since it burns easily. In My previous post I gave some tips for polishing this type of paint with a machine. 


Incredible!

Step Three:  Rinse the panel a final time and once it dries apply Step 3 with a clean terry cloth. 

Machine: I've had fantastic results using a machine with Step 3 and a polishing pad. In my previous post I gave some tips for using a machine on this type of paint.


 All finished!


Wax: You only want to use a cleaner wax if you stopped after step 1. If you went to step 2 or 3 then a cleaner wax is going to the dull the shine back to step 1.  It will also strip any sealants and anything else you've applied. 

If you proceeded to step 2 or 3 then you will want a finishing wax. 

In either case, I have used Meguiar's NXT and Ulitmate wax with great success. There are probably better waxes, but they look great and have a sealant built in. 

Instagram filter
Entry One: Wet Sanding

There are probably thousands of threads written on how to restore your cars paint. However, to my knowledge, there aren't many on how to restore older Volkswagen and Porsche single-stage enamels. 

I want this guide to be easy enough that anyone can try it themselves. If you follow my instructions and take your time, you should have great results. However, If you are not comfortable doing this, please ask a professional for assistance. I'm not responsible if you mess up.


To begin, wet sanding is done to remove etchings, orange peel, or other blemishes from the finish. It is important to note that in most cases you should never need more than 1500-2000 grit. Any sandpaper below 1000 grit should only be used for prep, and never for correction.

Wet sanding is an extreme measure done to remove paint imperfections and is not required to remove oxidization. Also note that metallics were often clear coated, so be aware that these instruction are mainly for solid colors.

When taken care of, these alkyd enamels have some of the best color and shine found in a single-stage. However, by today's standards, these paints are very soft and can be easily etched by acids in rainwater and bird droppings. Compound that with the fact that they oxidize quickly and you can see why they are so hard to maintain.


 An etching left by bird droppings
  
To remove etchings from your paint, you will need 2000 grit sand paper and a professional grade rubbing compound from your local automotive paint shop. Consumer grade compounds from the auto parts store and Walmart won't work. You need something that specifically states on the label that it is capable of removing sandpaper scratches.


3M Perfect-it system and three clean terry cloth towels

I use 3M Perfect-it for many reasons. The most important is that it is strong enough to remove 1200 grit sandpaper scratches and most blemishes. It's not the heaviest cutting compound that I have, but it is the most versatile. This compound can also be worked by hand, which is important with these kinds of paints which can burn easily. Also, you don't need a chisel to remove it when it dries like other compounds.

Tip: Always be sure to read the label and follow the instructions. The compound you choose must be able to remove 2000 grit sandpaper or greater, and must be able to be applied by hand. Even a D/A can burn these paints if great care isn't taken.


3M P2000 / 2000 grit sandpaper.

This goes without saying, but always use a high quality wet/dry sandpaper. Lower quality sandpapers might not be as uniform and can result in a finish that looks like it was cut with a steel wool.


 Sand in straight lines

Step one: Clean the surface that you are sanding thoroughly. Soak the sandpaper in bucket until it begins to curl. I find that adding just a drop of dish detergent helps the sandpaper glide smoother and prevents build-up which allows the paper to last longer. 

Be gentle, stay away from edges and creases in the body work where the paint is thin. It doesn't take much to remove the paint in these areas. Let the sandpaper do the cutting without adding pressure. Move in straight lines and keep the sandpaper and surface wet. Rinse the paper often to remove buildup and any dirt that might get trapped. This dirt can scratch the paint and the scratches will remain visible even after polishing, so care must be taken. Most of the time you can feel when there is dirt caught under the sandpaper, so move slowly and cautiously.

Tip:  If using multiple grits of sandpaper, you can change the directions for each one, allowing you to tell you what spots you missed.


Etching removed with 2000 grit sandpaper

Here I have gently removed the etching left by the bird dropping with 2000 grit sandpaper. I use a paper towel to wipe away the water periodically to make sure I've completely removed the blemish.  

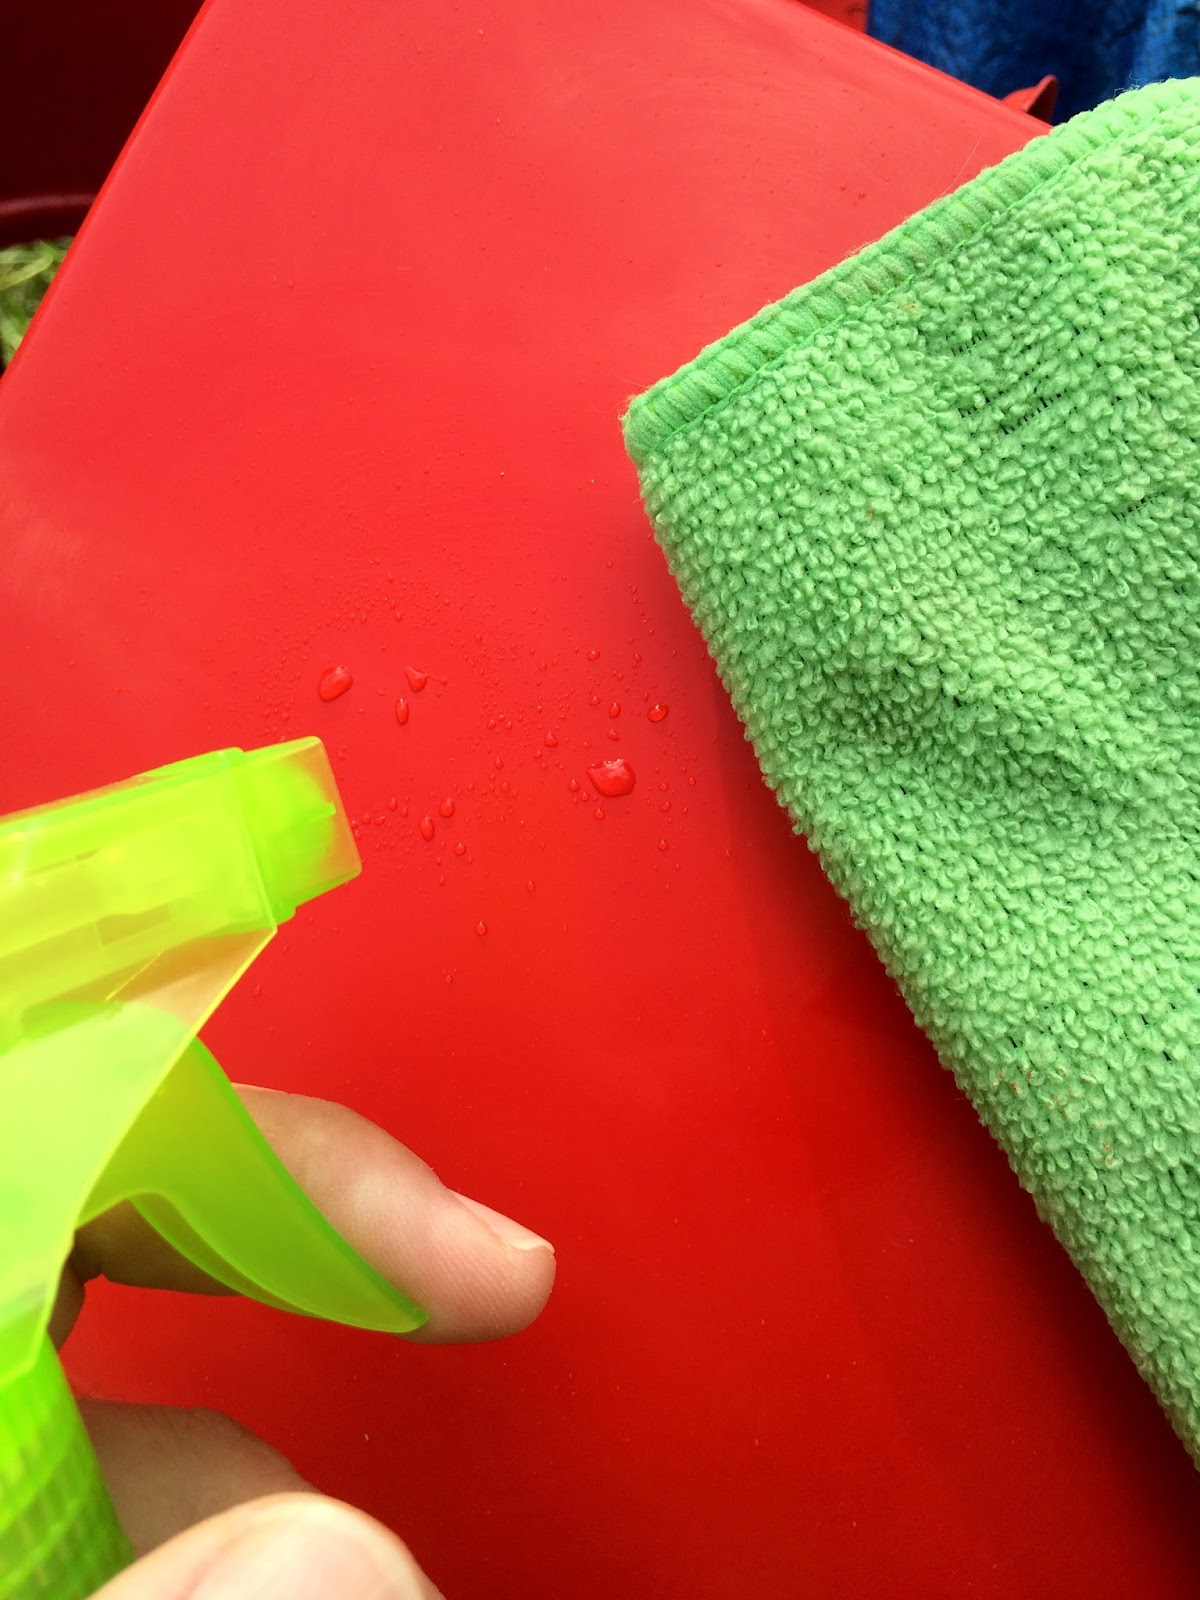
Tip: The water running off contains a high concentration of paint which can stain anything it comes into contact with. Be sure use paper towels to soak up and prevent the water from running onto your door jams or shop floor! If a hose is available, be sure to spray everything off before it has a chance to dry.


Panel sanded with 2000 grit to remove orange peel finish

I smoothed this panel using the same technique I used to remove the etching left by the bird dropping. Smoothing the paint in this manor removes the undesirable lumpy finish that resembles an orange-peel and leaves the paint looking like a mirror when polished.


Rubbing compound

Step Two: Once all of the blemishes have been sanded away, you are ready for the rubbing compound. 

Simply place about a dime size amount of your compound (3M Step 1) on a new terry cloth and work it back and forth. Don't rub hard, just work it softly and slowly, working only a small area at a time. The more you work the compound the better the shine, so don't add more too often, but don't let the cloth get too dry or it can damage the paint.

Machine: I don't recommend using a D/A or rotary for this step. A terry cloth will make quick work of those scratches and there is little to no risk of damaging the paint so long as you follow the instructions.


Before and after polishing


Step Three: At this point you should have a nice shine, but we are going to take it a step further. 

Start by rinsing the panel to remove any trace of the rubbing compound. Once the panel is dry, use another terry cloth to work in the Machine Polish (3M Step 2) just as you did before.

Machine: If you have a D/A or rotary with a polishing pad, you can use it if you want. Do not use a cutting pad as they can damage this paint. Also don't use a rotary unless you have experience. Regardless of which machine you are using, here are some tips.

Tip: Make sure that you saturate the compound into the pad before starting. Polishing this paint isn't like polishing harder modern paints. On modern paints it's fine for the weight of the machine to be on the paint, however on these paints you do not want much, if any pressure on on the pad. It should just barely touch the surface. Keep the rpms low and the pad parallel to the surface. Don't let the edge of your pad touch the paint. Keep the pad moving constantly not fast, but don't stop. Never let the pad run dry. You only need to make about five passes over a given area, so be careful, and your paint should turn out beautiful! 


The etched area corrected by hand with polishing compound

Step Four: Just as before, rinse the panel to remove the polishing compound. Once dry, apply 3M Step 3 finishing compound to a clean terry cloth and work it in just as you did the other two times.

Tip: I consider this step optional on lighter cars, but is recommended on darker colors like Reds and blacks.

Machine: I have had great results using this compound. It is to be applied with a finishing pad. If you did the previous step with a machine, then you should have no problem doing this step. Be just as gentle as you were before and you'll have great results!


Step 3 + finishing pad = incredible results!

Wax: Waxes will help protect your paint from the elements and prevent this type of paint from oxidizing. They are an interesting topic that I could write an entire post on, but for now I will try to simplify.

Cleaner Waxes
Most car waxes that you will come across are "cleaner waxes". This means is that they have detergents, abrasives, or various other types of chemical solvents designed to remove old waxes, sealants, and light swirl marks, all in one step. Since these types or waxes are worked into the paint, they are not meant to be used on new or polished paint. They might be great for the average consumer that just wants to make their daily driver look nice, but applying a cleaner wax at this point is moving backwards. Your shine will be dulled down and you will need to repeat steps 2 and 3 over again.

Finishing Wax
For the best finish, you will want to use a finishing wax or sealant. Finishing waxes have no cleaning ability and don't require you to work them into the paint. Most waxes/sealants now days have the ablity to glaze built in. However, if you are planing to use a pure carnauba wax, then you will want to do a final polish with a showcar glaze.

That said, I have been using Meguiars NXT and Ultimate wax for years with great results. 

Thanks for reading!